Wednesday, July 18, 2012

My 25th Pinniversary- A Win and a Fail

So the people voted (all 10 of them) and it was a tie. I would have to try making both the sugar glazed pecans in the crockpot and tcutting glass with string, nail polish remover and fire. First up were the pecans.

The idea behind this is to make those yummy candied pecans you can get a fairs and such in your own crockpot. The recipe comes from about.com and is linked from http://www.thegingerbreadblog.com/2011/06/crock-pot-recipe-sugared-pecans.html

Ingredients:

  • 16 ounces pecans or walnut halves
  • 1/2 cup melted unsalted butter
  • 1/2 cup powdered sugar
  • 1/4 teaspoon ground cloves
  • 1 1/2 teaspoons ground cinnamon
  • 1/4 teaspoon ground ginger

Preparation:

Turn slow cooker to HIGH about 15 minutes in advance. In hot slow cooker, stir together the nuts and butter. Add the powdered sugar, stirring to blend and coat evenly. Cover and cook on HIGH for 15 minutes. Reduce the heat to LOW and remove lid; cook, uncovered, stirring occasionally, for about 2 to 3 hours, or until the nuts are coated with a crisp glaze.
Transfer the nuts to a bowl.
In another small bowl, combine the spices; sift over the nuts, stirring to coat evenly.
Let cool before serving.

I broke my cardinal rule of crockpot cooking and forgot to put in a crockpot liner. I was too eager to get going and I didn't notice until I already had the butter and pecans in the pot (and that pot is still soaking in the sink, so that's my punishment). The beginning is pretty easy, turn the crockpot on high for 15 minutes, then throw in melted butter and pecans and stir that around, add powdered sugar and stir that around. After the initial 15 minutes on high you just need to go back every 20-30 minutes and stir it up (while it's on low). The smell in the house was incredible and that alone was almost (almost) worth the cost of the pecans (which are crazy expensive by the way). At the end of 3 hours the pecans looked like this.
Some of the pecans had a nice sugar glaze but the butter was still melty at the bottom and a lot of them were more buttery (not that that's a bad thing) than crunchy. I poured these into a Pyrex bowl to get ready to be seasoned.
This is what was left behind, not the worst crockpot mess I have dealt with but still, so take this as a warning! I mixed the spices in a separate bowl, sprinkled them in and stirred it around. I let them cool for at least 2 hours and they were still very oily from the butter. Taste wise they are great, the spices aren't over powering but they do give it great flavor. That being said, they still don't hold a candle to the ones you buy at the fair. These are good but those are better, but these are a great substitute and would probably great during the Thanksgiving/Christmas holidays (and easier than a pecan pie to boot).

So obviously you know the win, now here is the fail (which I was super bummed about) the glass cutting. I pinned this a few weeks ago and was excited at the prospect of trying it (and kicking myself for not knowing how to do this in college when I had way more glass bottles at my disposal). The instructions were found at http://valueplus.tumblr.com/post/18772917574/accidentalcharm-i-am-a-girl-who-likes-her. I was very careful (and so should you if you attempt to recreate this) and followed all of her instructions.
She used a Jameson bottle, I had an empty Woodchuck Cider bottle. I bought butcher twine at the grocery store (100% pure cotton), and used regular nail polish remover. The idea is to measure the twine to wrap around the bottle, dip the twine in the acetone, tie it around the bottle, clean up any residual acetone (and for god sakes wash your hands), and light the mother up (I also had a sink full of cold water, she had a bucket).


The problem was that the string would not stay on fire. If the lighter was next to it it would burn (but only where the flame was) but as soon as you unclicked the lighter it stopped burning. We tried two different times, making sure the twine soaked in the acetone for a good 3 minutes and still it was nothing like what the other blogger got to happen.

Now we are fans of Mythbusters and in true Mythbusters fashion we couldn't let this go as a total failure. So I soaked more twine in isopropyl alcohol for over 20 minutes, used a thinner bottle (had to sacrifice a Bud Light Platinum, beer gods forgive me), and Joe got out the torch. Here are the results:
The twine still wouldn't stay on fire and Joe had to turn the bottle slowly in circles to catch all of the twine on fire. It was good and charred when he dunked it in the water and it cracked and broke, but there was no way I could sand that down to presentable (it had small cracks you can see on the back side). Now I am disappointed that it didn't work and I'm not sure what to blame but I don't think my husband and I are quite done trying to work this one out. Thanks for being a part of my first 25 (I guess 26) pin experiements and here's to many more.
And the winner is......Karbear!
She was the first to comment and her number came up here. Thank all so much for supporting my blog and me! I was hoping for a larger turnout of people, but I am excited that those around me have been so supportive of me efforts and I really appreciate it.

Now the challenge is I have a tie for my winning pin. The DIY nail polish had 1 vote, the Tomato Basil Soup had 1 vote, the Pecans had 4, and the cutting the bottle had 4. I tried to get a tie-breaking vote at the last minute but alas is was not meant to be.

So the only fair way to solve this problem is to not solve it and do both. Or I could try to cook the pecans in the bottle while I'm attempting to cut it (on second thought that's probably a bad idea). I am off to the store to pick up my needed supplies for both assignments (I am going to wait until my husband gets home to attempt the bottle one, I need someone who can work a fire extinguisher). My posts should be up later this evening so check back later.
 

Monday, July 16, 2012

The Contest for my 25th Pinniversary

Sorry I am a bit late in posting this but I was trying to get a logo made for my blog (it's not great but I needed something until I could create something more professional). So I had the idea about a week ago to have a giveaway to celebrate making it to 25 unique pin creation attempts. I honestly didn't know if I would stick to it this long but I have had such good feedback from friends and my posts have been seen by people all over the world (Yeah Blogger Audience tracker) I knew I had to stick with it. I also have been following other bloggers and wondered how they got so many followers, and I know a few of them do giveaways from time to time to drive up viewership and comment posting so I thought I could jump on the band wagon.

So my give away is a $25 iTunes gift card, guaranteed to be active and shipped to the winner within 2 business days so here is how you win:
1. Join my website as a follower. There is a link on the right hand side to become a member, it's super easy to do and you'll get updates when I add new content.
2. I'm going to post 5 different options below for what I should do for my 25th pin recreation, you have to leave a comment at the bottom of this post with your vote for which project you think I should do.
3. I will put the number of comments in a random number generator and the person whose comment number was chosenwill win the card. (i.e. Your comment was #38 out of 75 and the #38 comes out of the number generator you would be the winner). You have to be a follower so I can contact you if you win. If this goes well I'm sure I will do more.
4. When you receive your gift card if you could take a picture of yourself holding it, I will absolutely put it up on the blog!

So here are the five finalists for my 25th Pinniversary:

Neiman Marcus Brownies


Sugar Glazed Pecans in the Crockpot

Tomato Basil Soup in the Crockpot


DIY Nail Polish


Cutting glass bottles with string (and fire)

Now all you have to do is follow my blog and comment on which pin you want to see me try and recreate. Voting starts now 7/16/12 at 11:00am CST and goes through 7/18/12 at 11:00am CST. I will post the winner of the gift card and the winning pin then and have the final pin results up later that evening. Good luck and thanks for playing along!


Sunday, July 15, 2012

Challenge 24- Recycling Old Crayons (Got to love being eco-friendly)

I have been wanting to try this pin for a long time and have been saving (or some might say hoarding) all of the crayons the kiddo has been getting from the restaurants we eat at for a while. She actually got one of these recycled crayons in a very nice Valentine she got at daycare. I was shopping the Dollar Spot at Target before the 4th and saw a silicon ice tray with star shapes and thought it would be great for this pin.

Step one is to remove all of the paper from the crayons, I started the hard way and tried peeling it by hand. After a few crayons (and I a lot of crayon wax stuck under my thumbnails) I started channeling my engineer husband and got out an Exacto knife and sliced the paper off (very carefully, I could have very easily slice my fingers so watch out). I threw the crayons into a large Ziploc bag when I was finished.
I didn't use any brown or black in my bag because I wanted them to be colorful and not just dull and dark. Also as you can see there were a few thicker ones along with some smaller ones and they came from all different brands. Next the toddler and I took out some frustration out on the bag with the back of a large cooking spoon (I wanted her to help and I thought a hammer might put holes in the bag) to crush up the crayons into small and easy to melt pieces. At this point I pre-heated the oven to 250F.
We then filled the star mold with crayon pieces, trying to mix colors and fill them up fairly full. Some one the piece were still pretty big and it didn't take much to fill up all 10 stars.
I put the mold on a cookie sheet in case there happened to be any spillage. In the oven they went and the timer was set for 10 minutes.
After 10 minutes they were melted nicely and I took them out to cool. As you can tell the mold melted a bit as well (that's what you get for a dollar from Target). The key to keep them from breaking is letting them cool completely, then pulling around the edges of each shape, and the popping them up by pressing on the bottom.

I had two break but that was from my impatient testing to see if they were ready, and the still worked as crayons they just didn't look as nice. These are fun and easy to do and I still have a pretty full bag of crayon bits and pieces so I know I'll do this again. I will however search for molds that are more oven friendly.

Check my post tomorrow for the special instructions to win a 25 dollar iTunes giftcard for my 25th Pinniversary. You have to check back tomorrow July 16th after 10am CST for instructions.

Friday, July 13, 2012

Challenge 23- DIY Bleach Decal Shirts- The possibilities are endless

I bought the supplies for this pin weeks ago and finally decided to give it a try after I finished a bunch of housework this afternoon. The pin comes from http://www.sixsistersstuff.com/2012/01/diy-bleach-t-shirt-tutorial-perfect.html which is a great blog that quite a few of my pins have come from. The only place I differed was using contact paper instead of freezer paper to make the decals.

Supplies needed: Cotton t-shirts in any color except white (I got mine at Dollar Tree but I had to hunt awhile for the right sizes), Bleach, Spray bottle with the ability to mist, clear contact paper, a semi large piece of cardboard (I used a flattened cereal box), and an image to trace (Thank goodness for Google Image Search)

We are a super hero family so I knew when I did this I was going to have to do super hero logo's. I found a black shirt in the husband's size and a blue on that would fit the toddler (it was still a bit big) so I chose the Red Lantern symbol for the husband (FYI bleaching black fabric makes it turn a reddish orange shade) and Wonder Woman for the kiddo. I searched for the images through Google, put the pictures in Power Point so I could size them and then I printed them. Because the contact paper is clear you can put the image underneath it and trace.

The Wonder Woman logo was pretty easy to trace and cut out with scissors, however the Red Lantern symbol was a bit more intricate and involved an Exacto knife to get the decal finished.
Peeling the back off of the contact paper took a bit of practice (and having decent thumbnails didn't hurt either). I laid the shirts out flat and did my best to center the decals. I feel like a did pretty good with Wonder Woman but my Red Lantern ended up a tiny bit right of center.
The blog suggested putting a flatten cereal box inside the shirt to keep the bleach from soaking through the back of the shirt. I took the shirts into my bathroom to use the tub as my spraying area (I figured kill two birds, bleach the shirts and disinfect my tub). I mixed the bleach/water mix (70% Bleach, 30% water) in my spray bottle and went to town. (Turn on the bathroom intake fan if you are doing this inside, Rookie mistake #1)
The second the bleach hit the black shirt it started changing color. I went a little overboard with the spraying and ended up spraying most of the shirt (Rookie mistake #2).
I hung that one up to dry and started working on the second shirt. I tried to be a little less liberal with the spray and I think it came out better looking. However, it did take more bleach on the blue shirt to see the change.
After they dry completely (took about hour and a half), they need to be washed (after you take off the decal) in an empty load to get all of the excess bleach off of the fabric. Then run them through the dryer. These are the finished products.


I think these are super cute and easy to do (once you get the hang of spraying). I'm still trying to figure out what decal to do for me (I'm totally up for suggestions). Pin #24 is up tomorrow and I have a special surprise for my 25th Pinniversary.
Challenge 22-Doritos Chicken Bake

I'm finally back from my sojourn to Ohio and even with my best intentions of trying out pins while I was visiting, I still failed miserably. It is just too hard to visit, keep your eyes on a three year old, and try out pins at the same time. However my mom did try one with Kathryn while she was babysitting that turned out pretty cool that I will post pictures up of soon. Now on the the star of the post-the Doritos chicken bake.

I pinned this one not to long ago and when I was deciding what to make for dinner yesterday, I immediately recalled this one in my memory and decided to give it a go. The recipe comes from http://www.jamhands.net/2008/12/mexican-chicken-casserole.html (which is a really cute blog for mom's by the way)
Mexican Dorito Casserole 
Serves 4-6

2 c. shredded cooked chicken
1 c. shredded cheese (or more if you are a cheese hound)
1 can cream of chicken soup
1/2 cup milk
1/2 cup sour cream
1 can Ro-tel tomatoes (canned tomatoes with jalapenos-mild)
1/2 packet taco seasoning (or more- to taste)
Bag of doritos

1. Pre-heat oven to 350-f degrees.

2. In a mixing bowl, combine all ingredients except doritos.

3. In a greased 2 qt baking dish, put a layer of crushed doritos (about 2 cups), then a layer of the chicken mixture. Repeat once more, ending with a layer of chicken mixture. Top with more shredded cheese, cover, and bake for 30-35 minutes, till bubbling hot.

Now I always make my shredded chicken in the crockpot-throw in a crockpot liner, about a cup of chicken broth, 3 or 4 frozen chicken breasts, salt, pepper and turn it on high for 4 hours. The chicken will be cooked, tender, and super easy to shred.

The instructions are pretty straight forward and easy to follow (a major plus). Just throw everything in a bowl and mix it up.
Before mixing
After mixing
Be careful when crushing up the Doritos for the bottom of the casserole dish, my fingers were coated in cheesiness pretty quickly and I had to rinse them off twice during the process. I had trouble with the first layer when I poured the chicken on top of the Doritos, the chips wanted to mix in with the chicken instead of staying on the bottom like they were supposed to. I did my best to spread them around and same for the second layer.
Oven ready
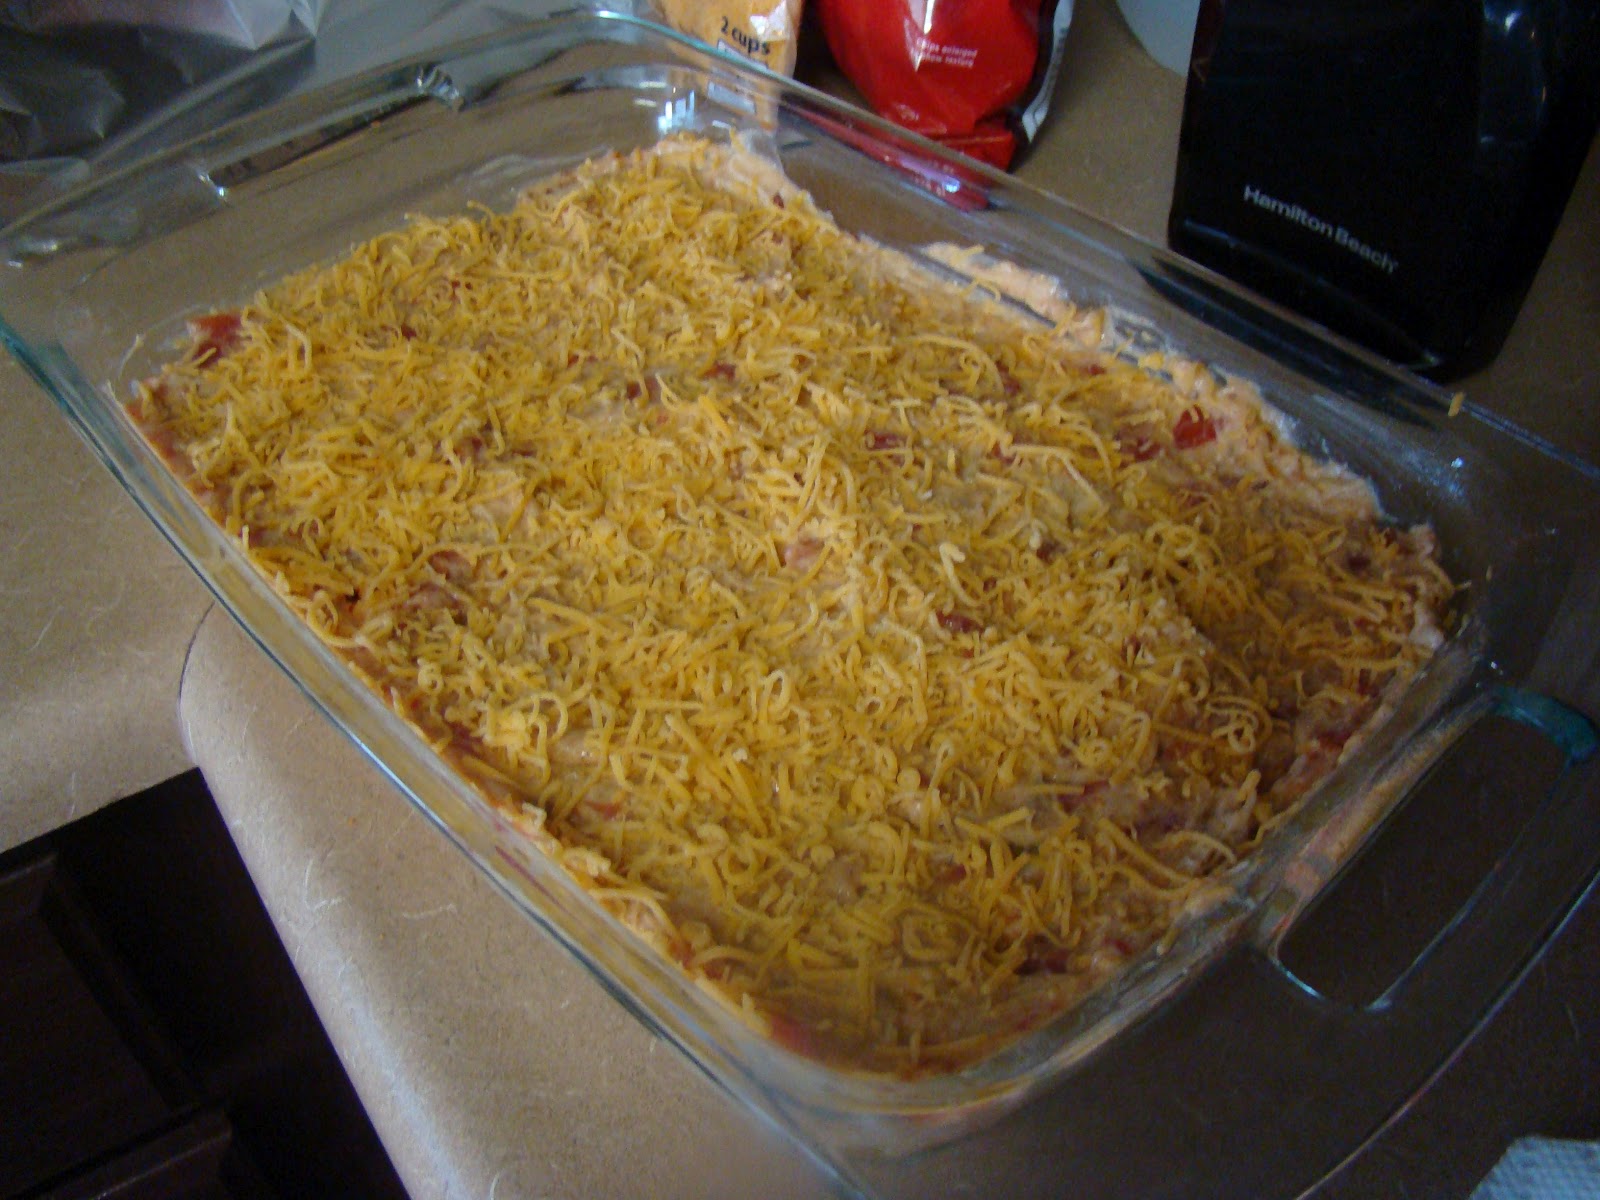
I used about 3/4 of a cup of cheddar cheese for the top and I covered it with foil like the instructions indicated. Timer was set for 30 minutes and it came out of the oven looking like this:
Taste wise this casserole is delicious. The Rotel (or Great Value diced tomatoes and green chilies) does give it a bit of a kick but nothing crazy. It is pretty high calorie (I was too afraid to put all the ingredients into the calorie counter app) but if you practice portion control it isn't too terrible. Now the only thing I was disappointed in was that the Doritos got soggy while baking and I was missing that wonderful crunchiness I love about them. I remedied this by adding a few crushed chips on top of my serving. (I used about 3/4 of the bag in the recipe)
This would be a great covered dish for a party and makes a great all around dinner, however the spiciness made it not so toddler friendly (which I think she was OK with since she got to have cereal for dinner instead).

Monday, July 2, 2012

Challenge 21-Can you pack a toddler for a trip in an organized manner? (We shall see.)

I pinned this idea a few weeks ago and thought it would be good to try with our yearly sojourn to the motherland (Ohio) coming up. I always pack a lot of clothes for the munchkin (she's 3, she can potentially wear a lot of clothes in a day) and they always end up a crazy mess by the middle of the trip. This pin from http://kimmccrary.blogspot.com/2012/05/traveling-with-young-children-tip-1.html is the idea of packing your child's outfits individually in Ziploc bags so you can easily find everything at once as well as give your child some choice without making it too difficult on either one of you. I happened to have bought a box of Great Value brand slider topped bags and figured these would work great. This is the mess of clothes pre-packed:
The main idea is to include every part of the outfit in the bag so you have to hunt for nothing (so panties, hair accessories, socks, etc.) to make pack and dressing as easy as possible. I put together the outfits, which was fairly simple since my child is definitely not wanting in the clothes department, making sure each outfit had all the pieces it needed (I almost forgot panties on two occasions). My kid isn't much in the hair accessory department, but a few outfits I included coordinating headbands or bows. Stuffing them in the bags wasn't much work, but I was trying my best to put them in flat to prevent wrinkles, but I still felt pretty wasteful using all of those storage bags. I justified it by promising that I would keep them and use them again when we are moving into our rental house at the end of the month.
I packed 9 outfits (for a 7 day trip...you never know). I also made sure to squeeze as much air out as possible so it was almost like having mini vacu-seal bags. I was able to pack all of these outfits, plus PJ's, 2 bathing suits, 1 terry cloth dress, and 3 extra pairs on underwear in a small carry-on size piece of luggage (with room to spare for 2 pair of her shoes and our toiletry bag).
For children I think this is a great packing method (other than the semi-wasteful use of storage bags). I'll probably add an update during the trip to see how well this method works in practice, but in the packing stage it is great. I think it will obviously be very easy to know what clothes are clean and dirty compared to the old packing methods. Well, we are off to Ohio tomorrow but I have a few  Pinterest experiments planned while I'm gone, I'm just not sure if I'll update while I'm there or make separate posts when I get back for them. Have a great holiday week!

***Addition to post on 7/13/12
I have to admit I loved this packing method. It made picking out her outfits so much easier, I knew where her underwear was, and I wasn't having to hunt down socks. I saved all of the bags to use later so I didn't feel as non-ecofriendly. On the way home we ended up using my husband's method of packing and rolling everything up to make more room (which was much more effective than my method of throw in and shove). It worked great and we were able to fit in a few extra things we picked up during our trip. I give a total thumbs up to this method and will definitely use it again.